workshop day
your kit is ready. you're just here to make it yours.
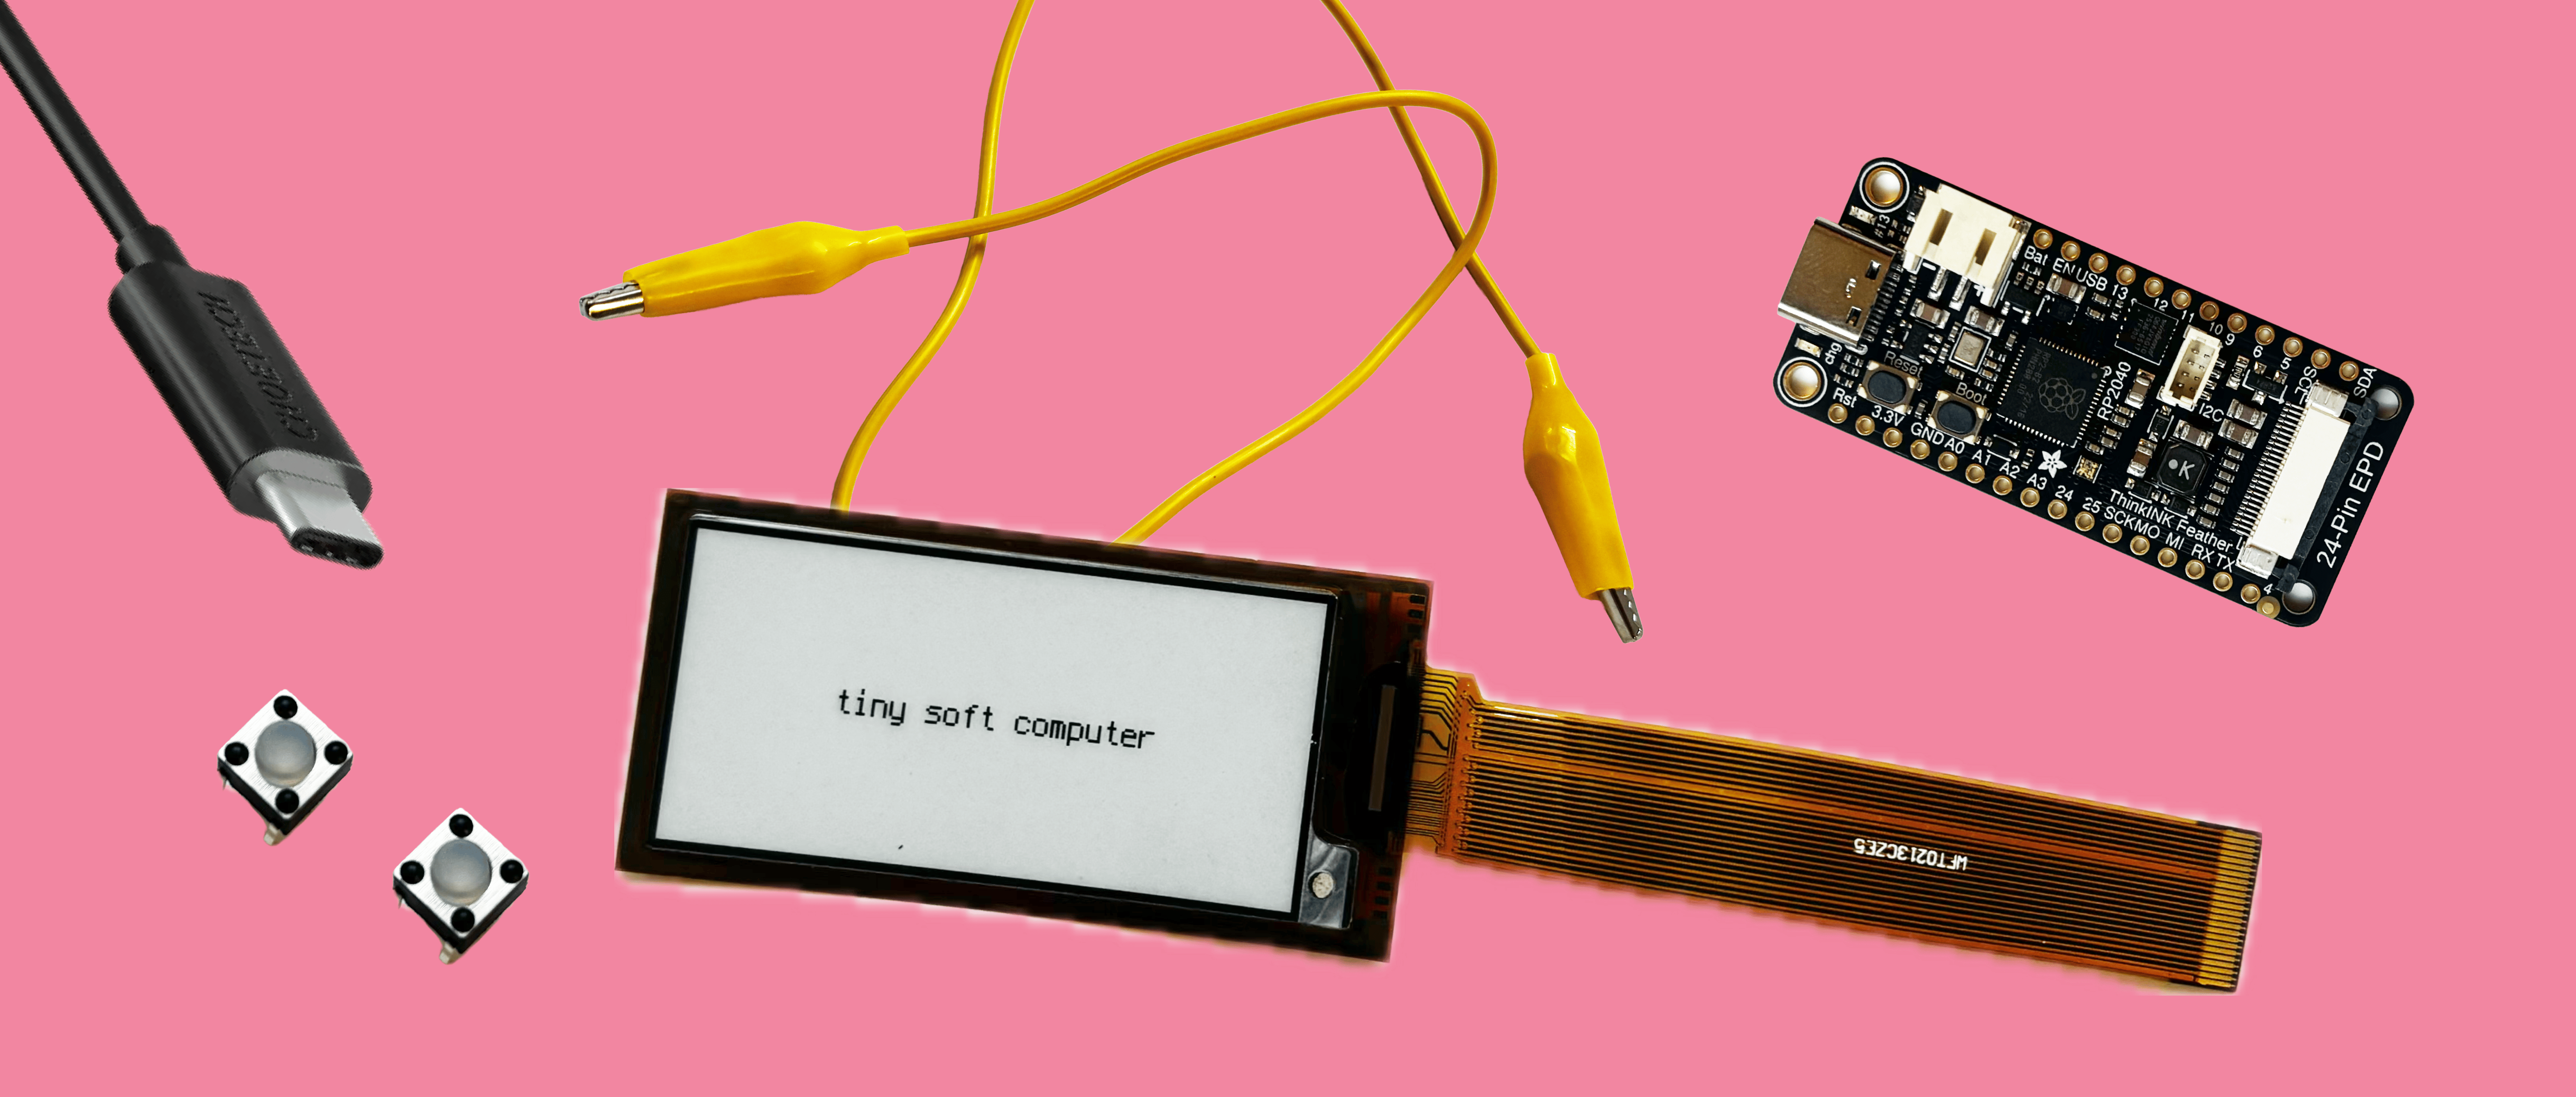
every kit arrives fully preloaded, CircuitPython, libraries, and code are already installed and tested. you won't be doing any of the technical setup, that part is already done. here's what you will do, in three parts.
what's in the kit
- 2.13" 212×104 Flexible Monochrome / 4-Gray eInk ePaper Display, ILI0373 chipset
- Adafruit RP2040 Feather ThinkInk for 24-pin E-Paper Displays, STEMMA QT
- 2 soft silicone top 6mm push-buttons
- 2 alligator clips

hardware: seat the display, wire the button
before touching any code, get the physical pieces connected. this comes first since the software part assumes the hardware already works.
seat the display

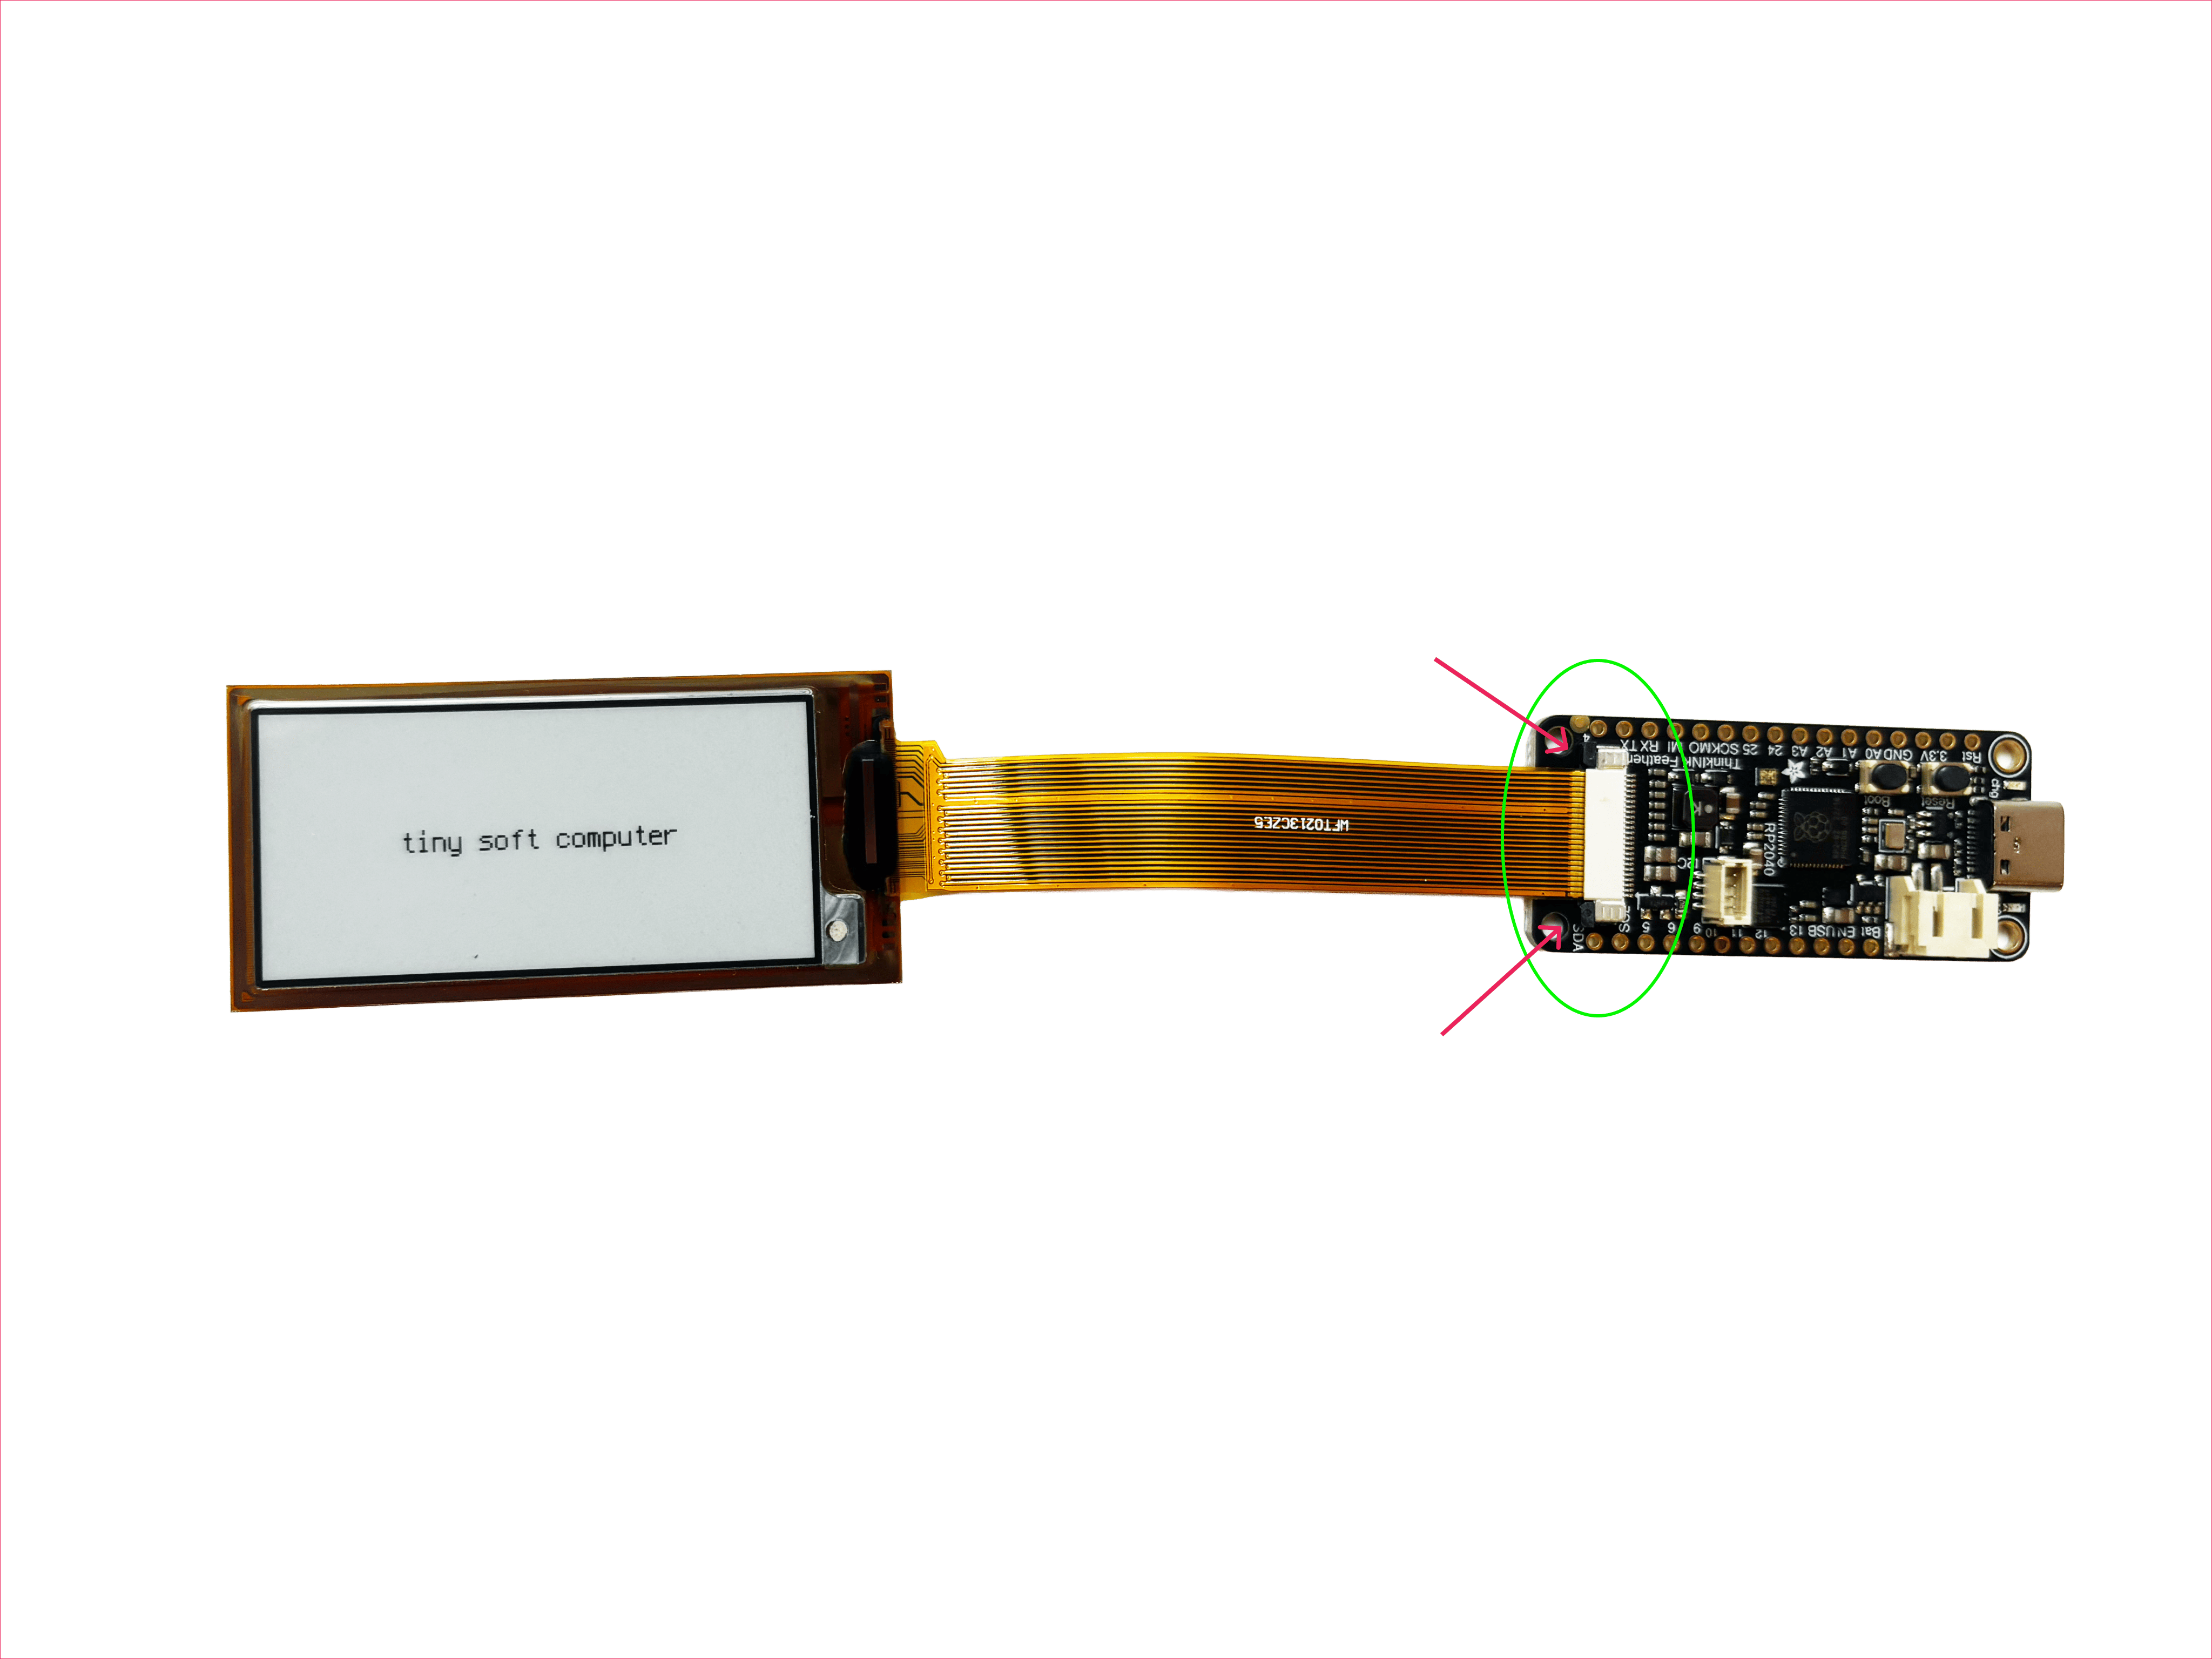
if your kit's display isn't already seated in the microcontroller's docking port, open the latches, insert the ribbon cable, and close the latches to hold it in place.
go gently here. the ribbon cable is thin and the display is soft, it's not meant to take force. let it slide in on its own, don't push. remember, these are soft computers, treat the cable the way you'd want to be treated.
wire the button

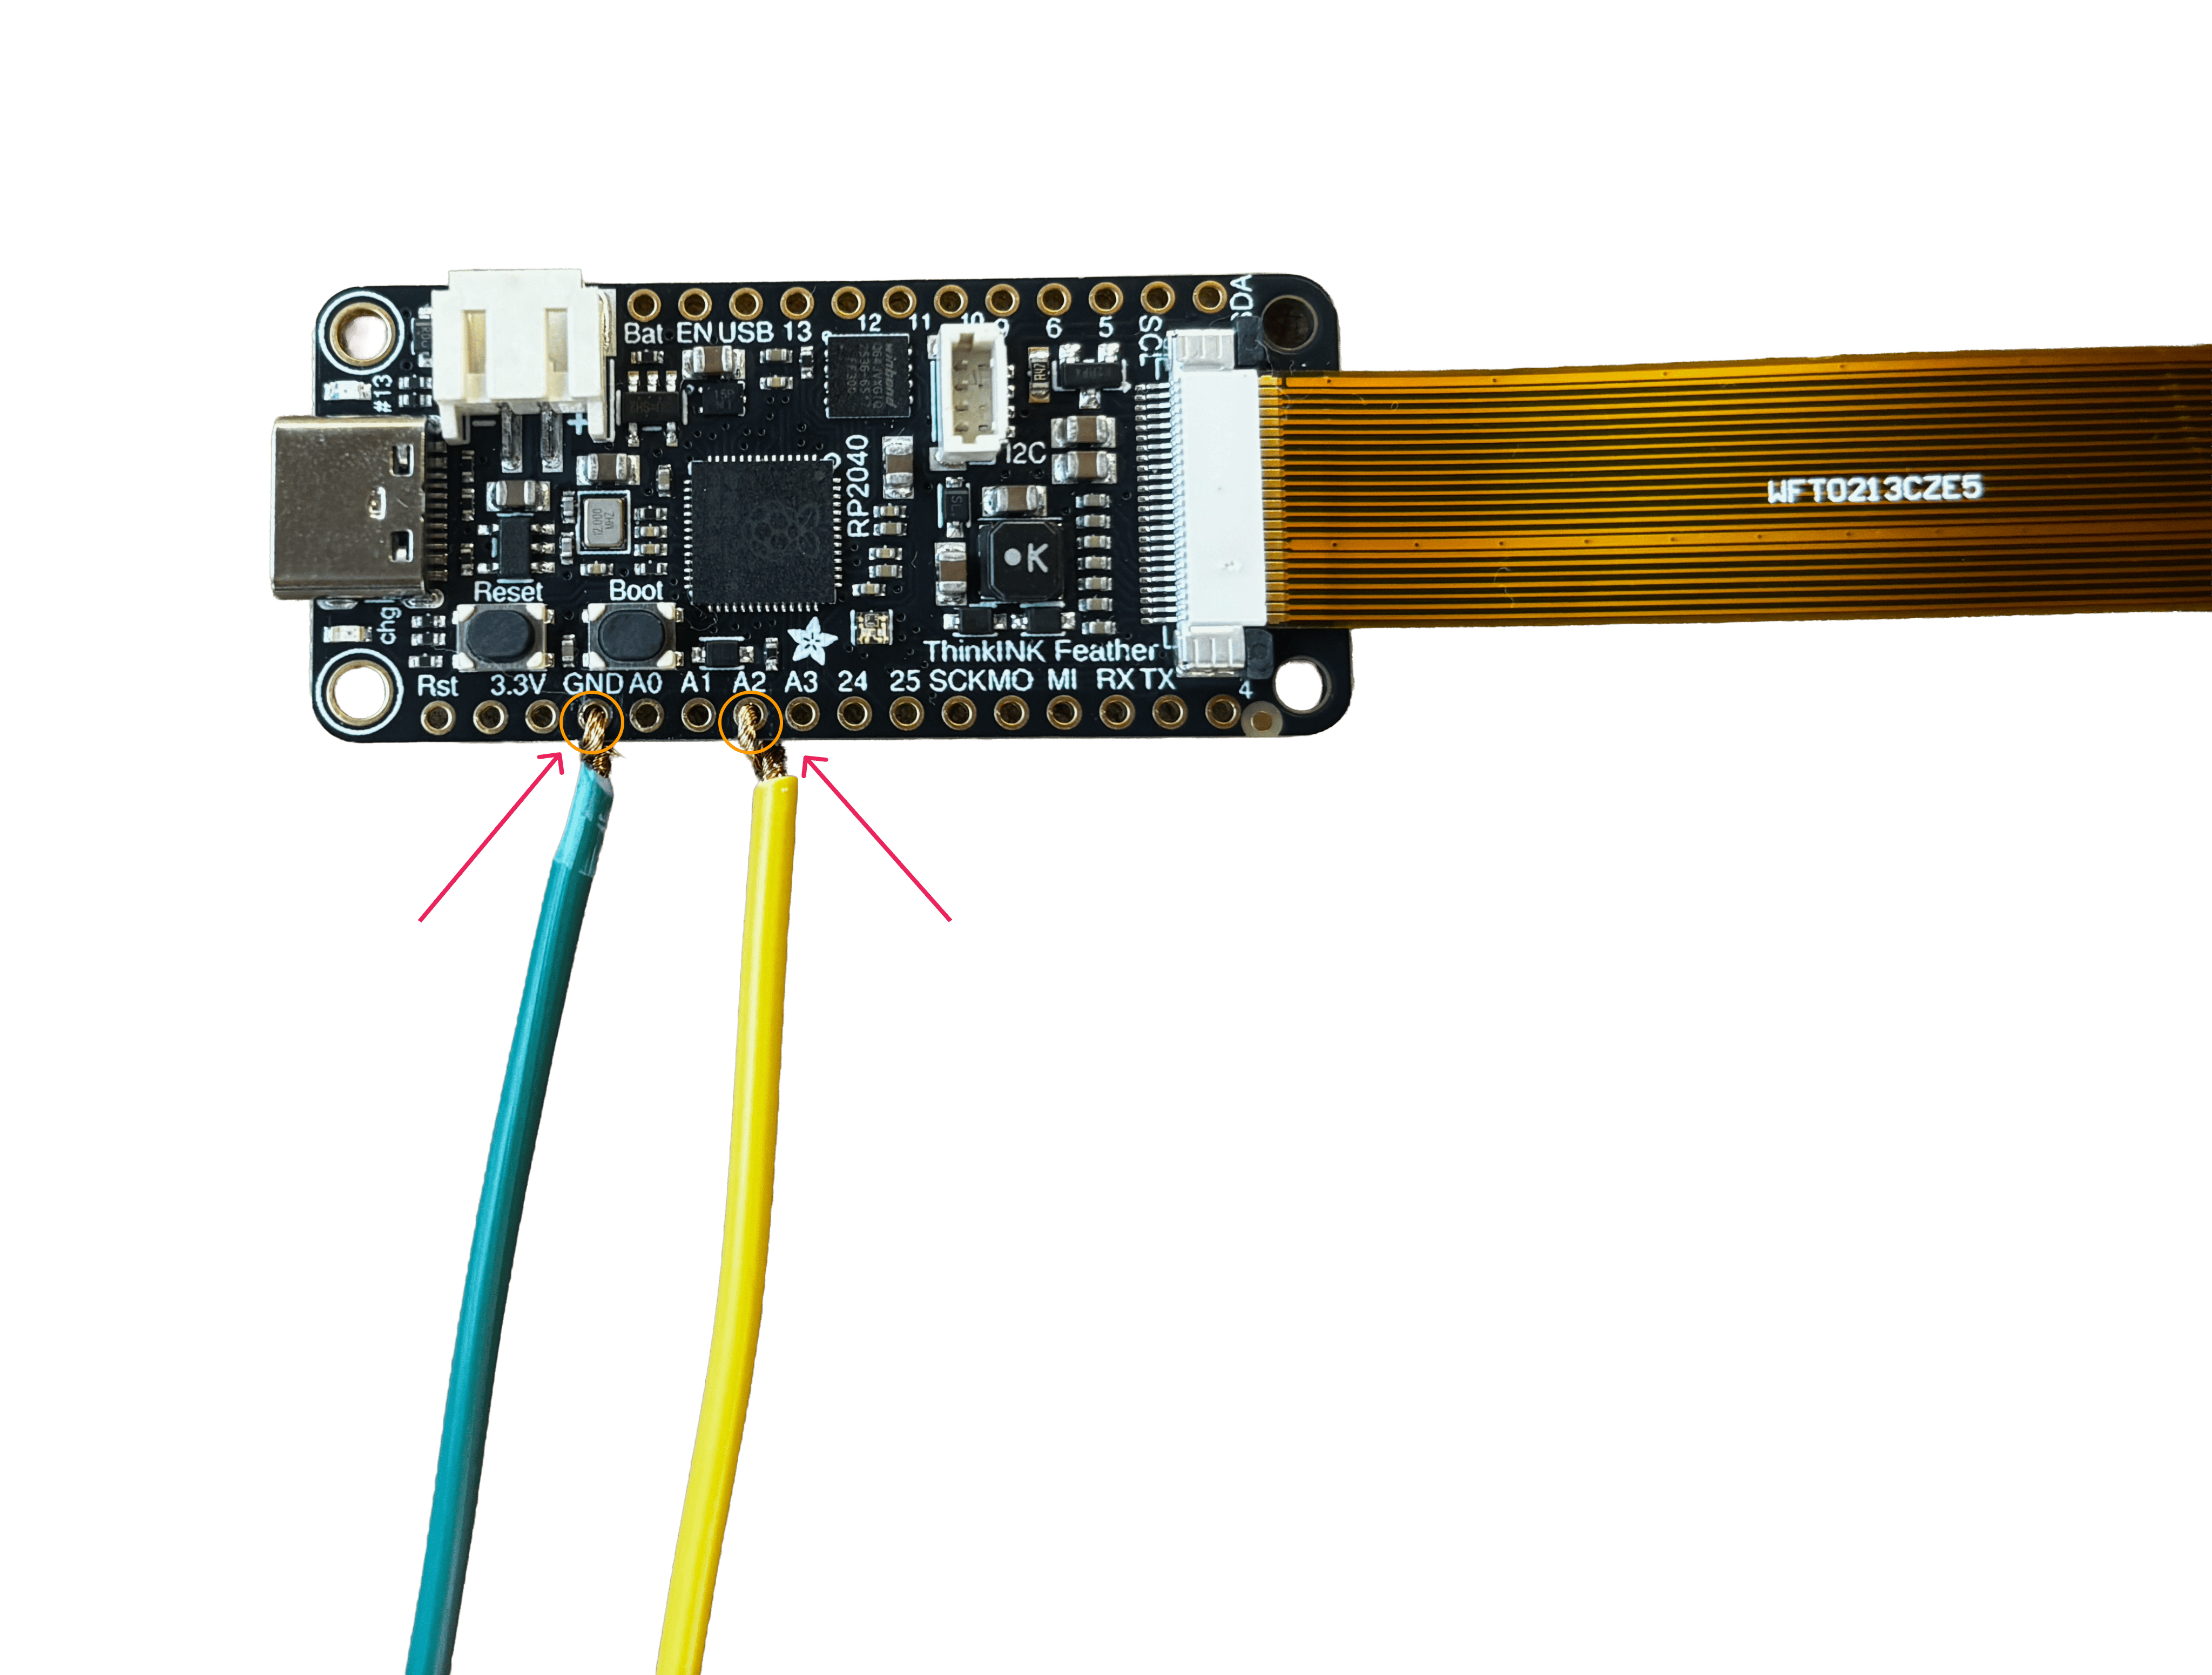
- find the button and its two wires in your kit.
- connect one wire to pin
A2on the board. - connect the other wire to any
GND(ground) pin. - alligator clips work fine as-is, no soldering or resistors needed.
soldering is optional. it makes for a more stable, permanent connection if you want one, but for now, alligator clips are completely fine and easy to adjust if something needs to move.
a button has 4 legs in 2 connected pairs. your two wires need to be on opposite sides. if the button doesn't respond, or responds backward, try moving one wire to a different leg.
the finished setup
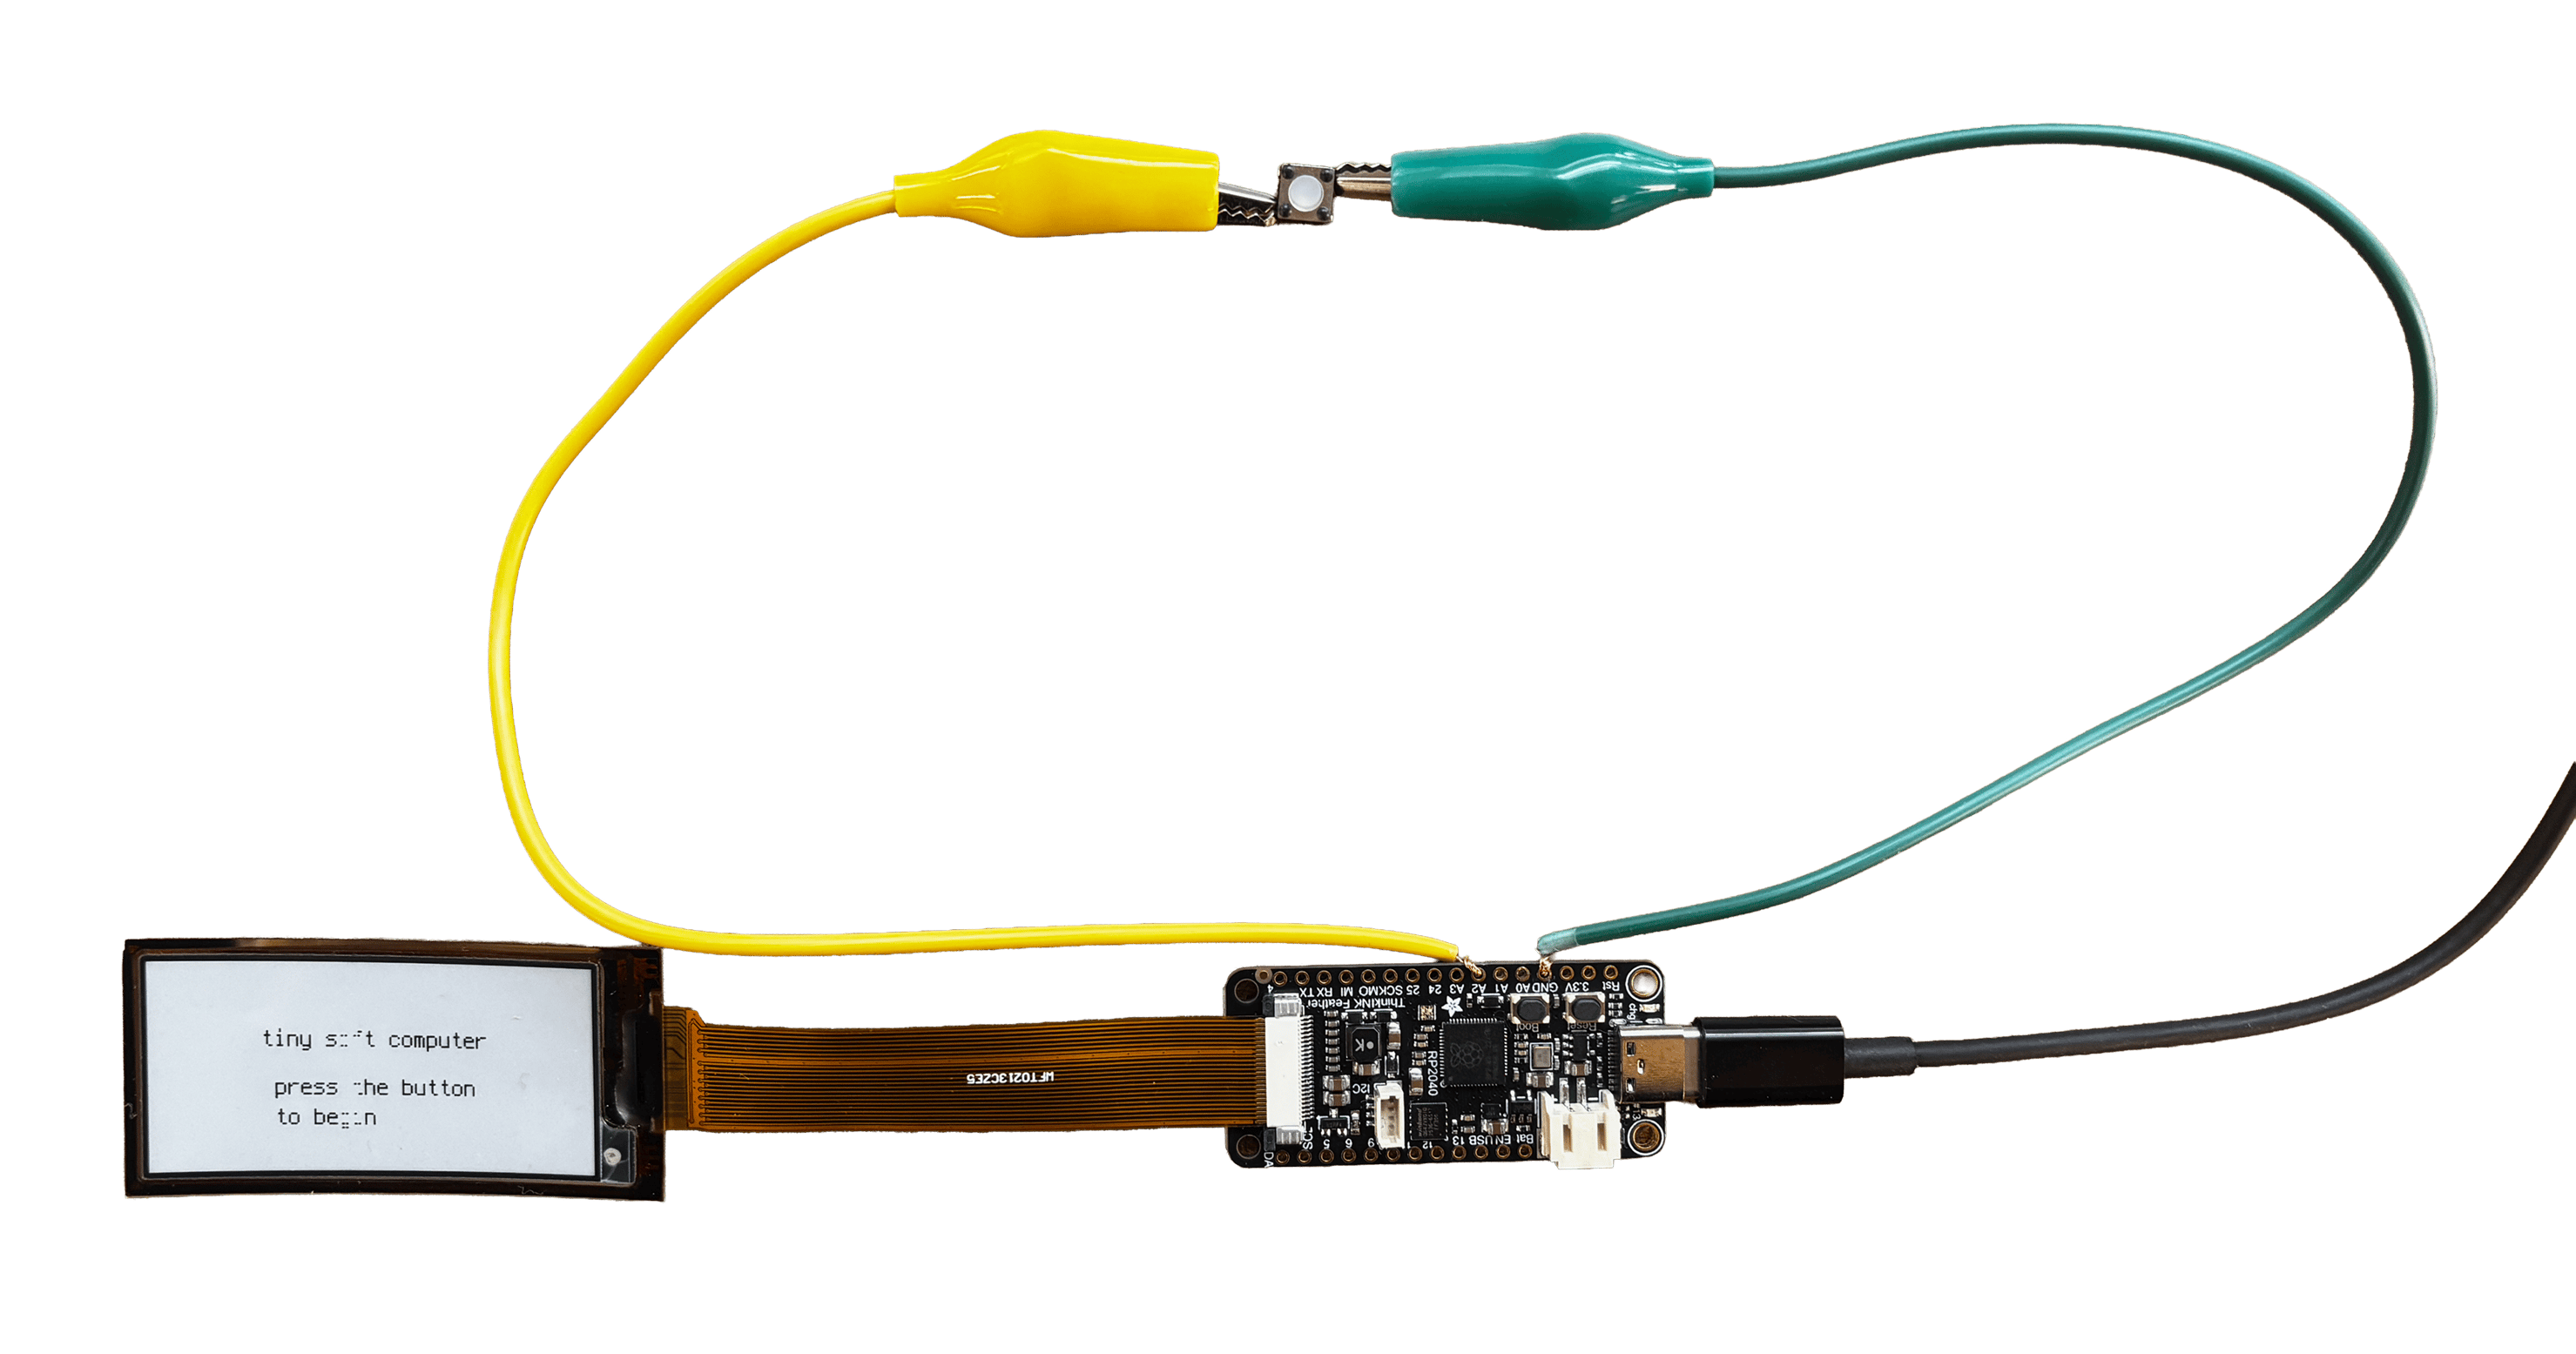
here's what it looks like once everything's connected, display seated, button wired, and the intro screen ready to go.
software: make the messages your own
the board already runs everything, you're only editing one part: the list of messages and small drawings it shows. this is done in an editor called Mu, which is already set up on the workshop laptops.
opening your code
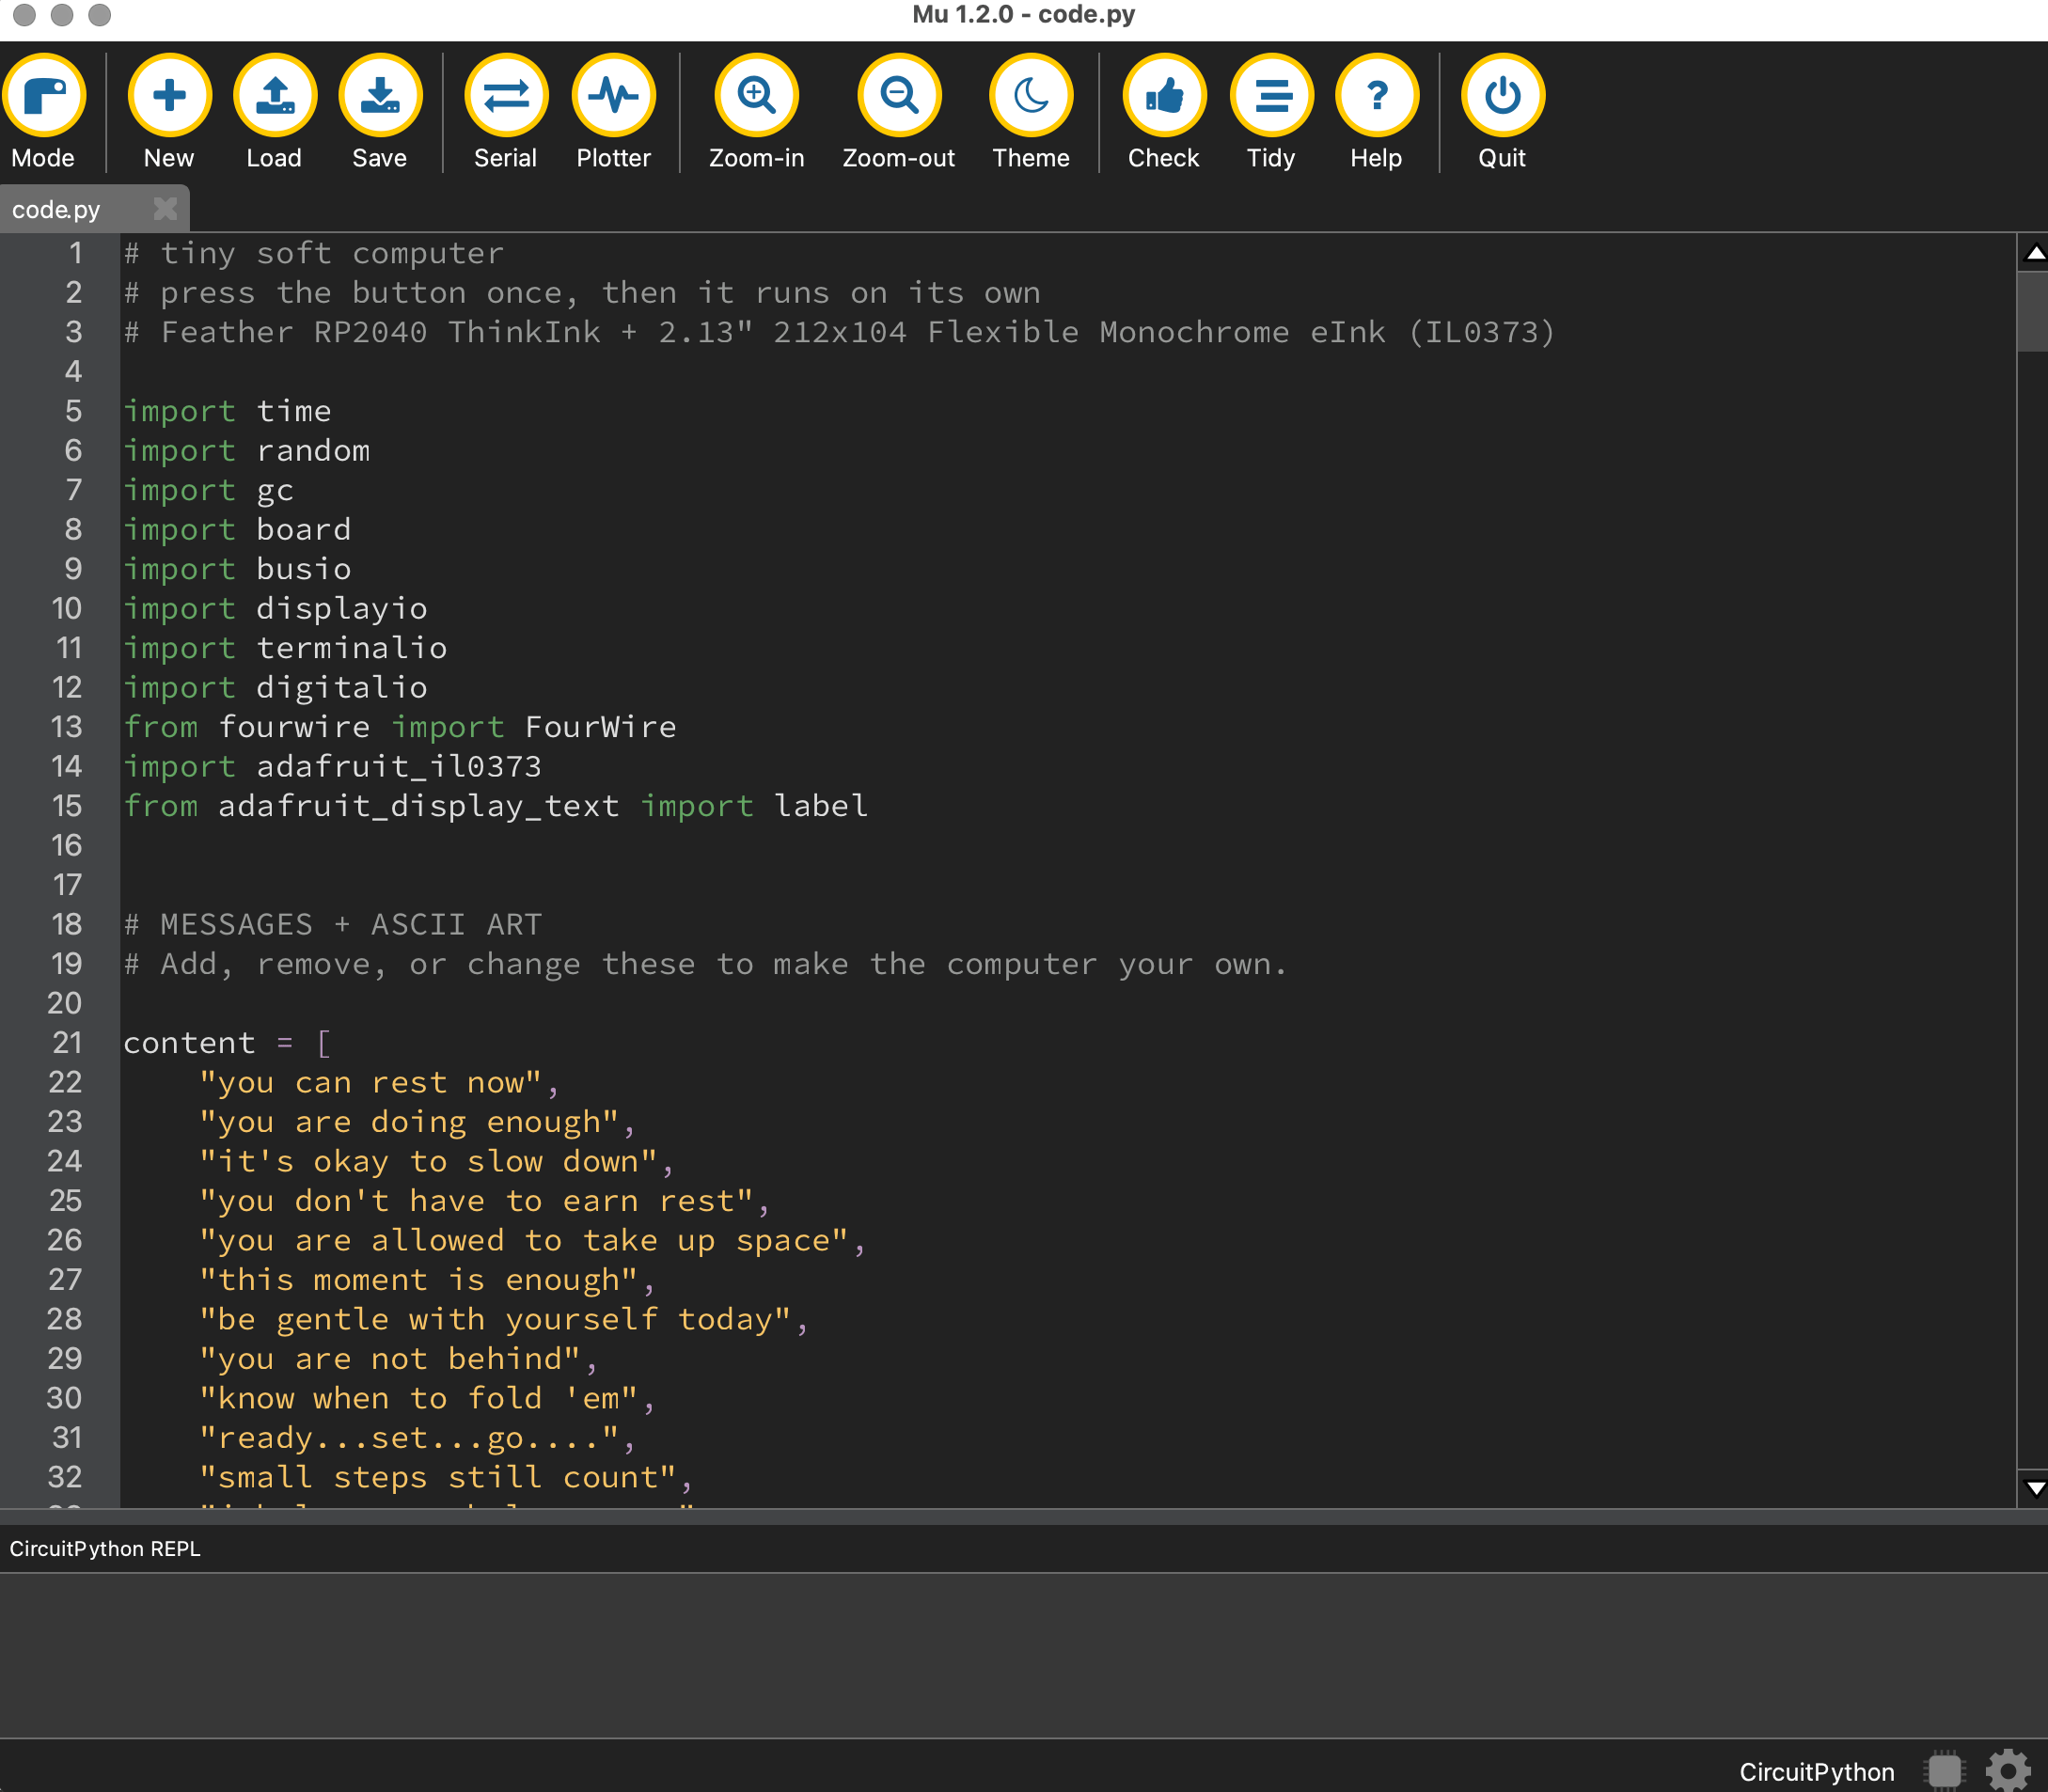
- if you don't already have it, install Mu Editor, it's free and works on Mac, Windows, and Linux.
- plug your kit into the laptop with a USB-C cable, if it isn't already.
- your board should show up as a drive named
CIRCUITPY, the same way a USB flash drive would. - open Mu Editor on the laptop. it should detect your board automatically and show a message at the bottom of the window.
- in Mu, use File → Open (or the Load button) and choose
code.pyfrom the CIRCUITPY drive.
editing the messages
- scroll to the section near the top marked
# MESSAGES + ASCII ART. everything inside the square brackets below that comment is the part you can edit. - each message is its own line, in quotes, followed by a comma. add a new one by copying that pattern, or remove one by deleting its line.
- keep messages short, the screen is small, and long lines wrap automatically onto a couple of lines if needed.
- you can also add small ASCII drawings the same way the "tiny sun" one is written, a few short lines of characters.
saving and running it
- save the file with
Cmd+S(Mac) orCtrl+S(Windows). - the board notices the change and restarts on its own, this is normal, you'll see it happen in Mu's serial console at the bottom of the window.
- once it settles back on the intro screen, press the button once to start it running with your new messages.
want to see the full code with syntax and comments explained? the code page has the whole file, with a copy button if you want to grab it.
fabrication: build and decorate your tiny soft computer
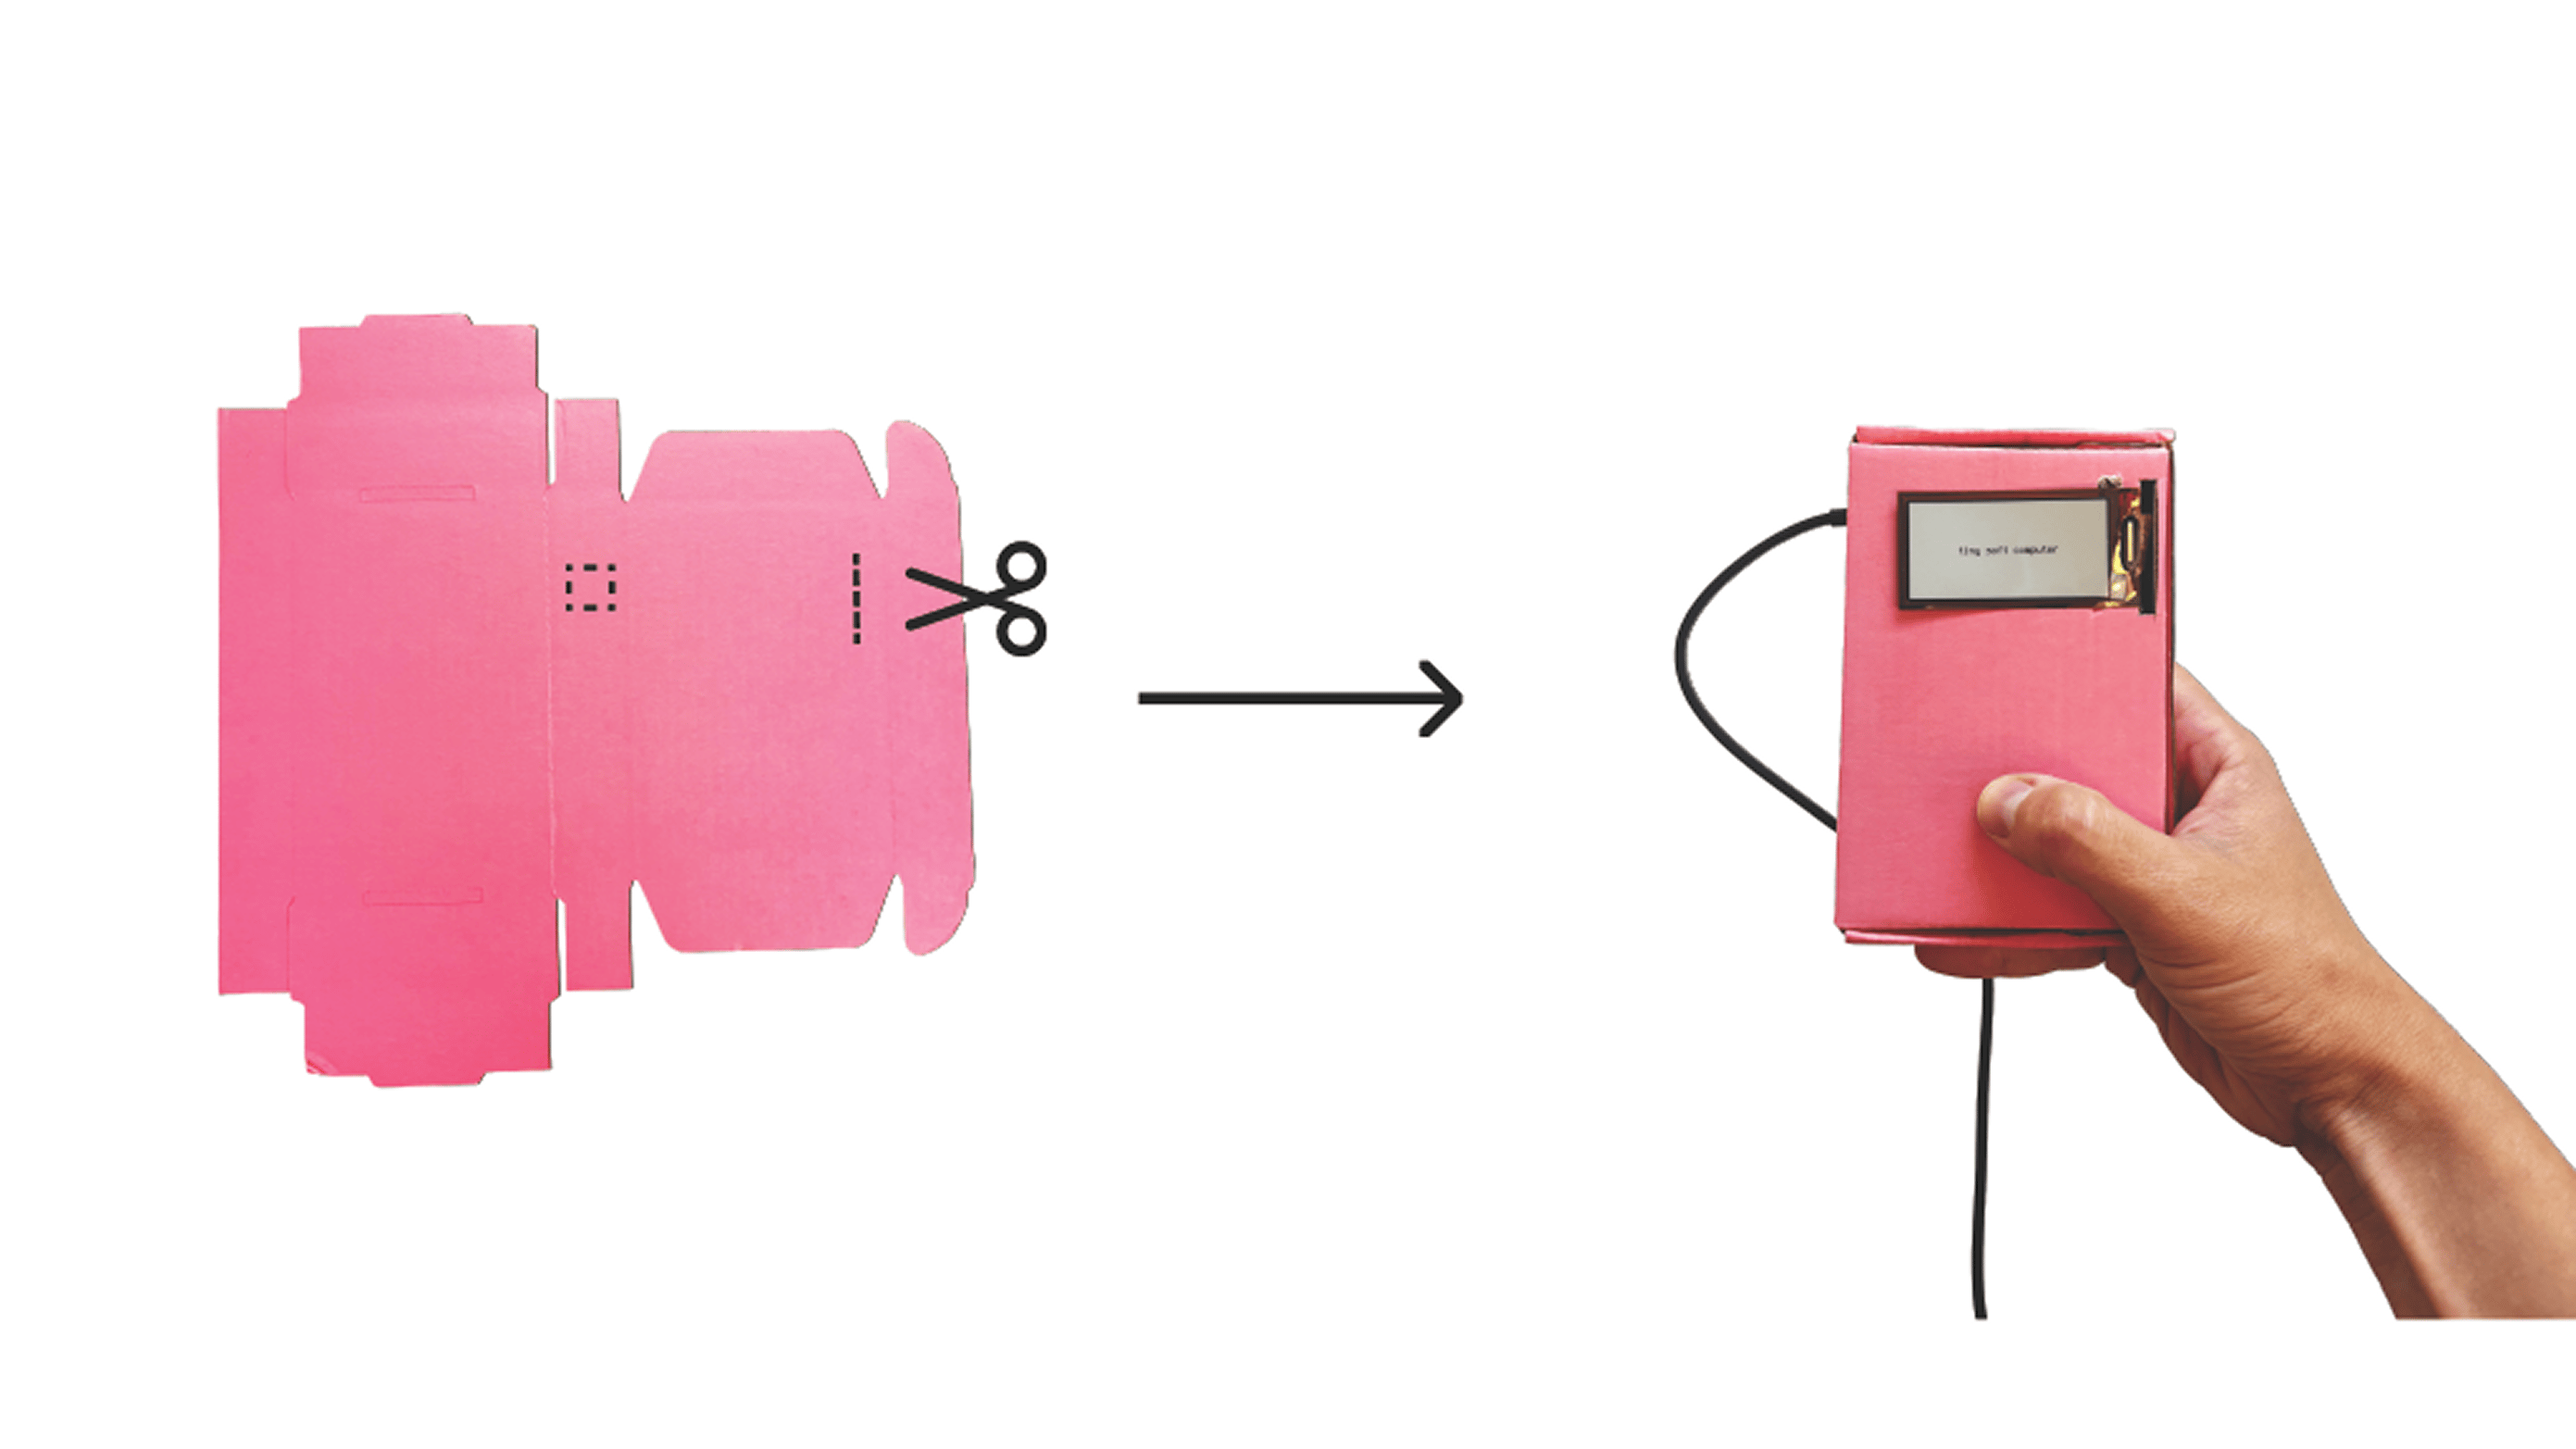
the kit's own box, cut and folded into a simple enclosure.
this is the open-ended part, and the one with no fixed steps. see fabrication for materials and a starting technique, but the form itself is yours to decide.
- soft, hard, exposed, hidden, anything goes.
- the only real constraints: it fits around your electronics, the screen stays visible, and the button stays reachable.
- we provide soft materials (felt, fabric, cardboard), and you're welcome to bring your own repurposed items too.
your kit actually arrived in its own small cardboard box, and that box works perfectly well as a base prototype enclosure just as it is. cut a window for the screen, poke a hole for the button, and you're done, no extra materials required. but it's just a starting point, not a requirement. fabric, paper, another kind of box entirely, whatever material speaks to you is fair game. this part is meant to be explored, take your time and have fun with it.
cardboard
the kit's own box, reused as-is (see photo above)

fabric, stretched in an embroidery hoop

packaging, bubble wrap and whatever else is on hand
take the zine with you
a short zine on the workshop and the ideas behind it, made for the SOFTER residency. grab whichever version is useful to you.
read the zine (screen version) → download for printing →
the screen version is laid out for reading on a phone or laptop. the print version is set up for printing and folding into a physical zine, if you'd rather have a paper copy.
a quick note on patience
the display can only redraw itself once every 180 seconds (3 minutes), that's the manufacturer's own spec for this exact panel, not something broken. press the button once, then let it be. more on why in about.